Last Updated on September 26, 2016 by Marc Seward
Scoliosis is a deformity of the spine which causes it to curve affects around 2% of the population of the United States. It usually presents itself in children between the ages of 10 and 15 and is more common among girls than boys, but it can also occur later in life.
There are a number of reasons why scoliosis might arise in adulthood including spinal surgeries, head injuries and joint distortions. Surgery is the usual treatment for severe forms of scoliosis where the spine is curved more than 45 degrees.
For younger patients with curvature under 45 degrees, the most common treatment is bracing which helps to straighten the spine as the body grows. Thereafter, patients with scoliosis are encouraged to perform daily back strengthening exercises for the rest of their lives.
The aim of these exercises is to promote balanced muscle growth in your back and shoulders and to encourage improved spinal curvature.
These exercises are aimed toward scoliosis sufferers and recommended by experts but if you have anything worse than mild scoliosis, you should speak to a medical expert before doing them.
You will need a stability ball and some light weights to perform many of these exercises…
1. Side Stretch
This exercise is recommended for scoliosis sufferers and is aimed at stretching and mobilizing your back muscles.
- Start in a standing position with your back against a wall and with your feet apart around shoulder-width.
- Allow your arms to dangle loosely to the side of your body. If the right side of your back is the one with the tight muscles, raise your right arm above your head and lean over sideways towards the opposite side.
- Place the other hand on your left hip and apply some slight pressure to the hip to increase the stretch.
- Reach your right arm over your head as far as you comfortably can and hold the position for at least 5 seconds then slowly bring your body back to its starting position.
- Do ten repetitions at least twice a day.
Click here to see VIDEO of the specific exercise.
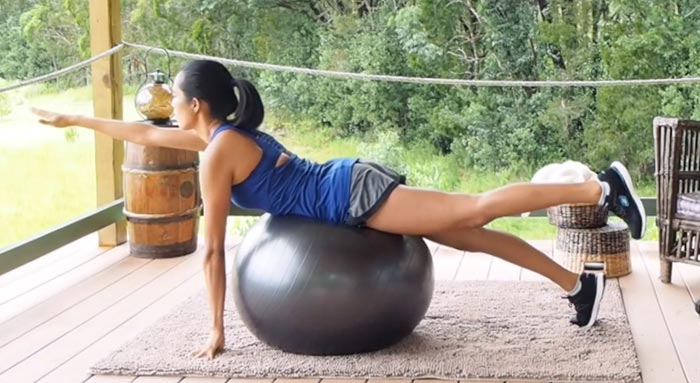
2. Arm and Leg Extensions
- Begin the exercise with your hips centered on top of the stability ball and the ball supporting nearly your entire body weight.
- Keep your right toes and left fingertips on the floor to make sure that you are balanced.
- Next, extend your right arm and raise your hand until it is level with your head and simultaneously raise your left leg to buttock level.
- Try holding the pose to a count of three and then lower your limbs to their starting position.
- Do ten repetitions and then change sides and perform ten more repetitions with the opposite limbs.
Click here to see VIDEO of the specific exercise.
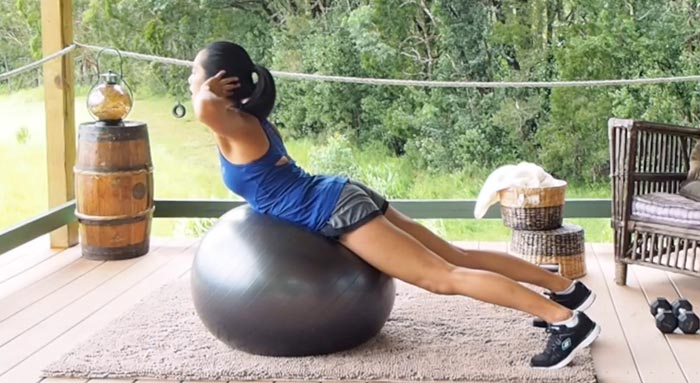
3. Back Extension
- Start this exercise with your knees on the floor and your stomach on the top of the stability ball.
- Slowly roll your body forwards over the ball into a nicely relaxed position with your legs stretched out behind you and toes touching the floor.
- Place your fingertips behind your ears and raise your body by squeezing your lower back and glutes.
- To make the exercise more challenging you can stretch your arms in front of your body instead.
- Hold this position for 5 seconds and repeat 10 times.
Click here to see VIDEO of the specific exercise.
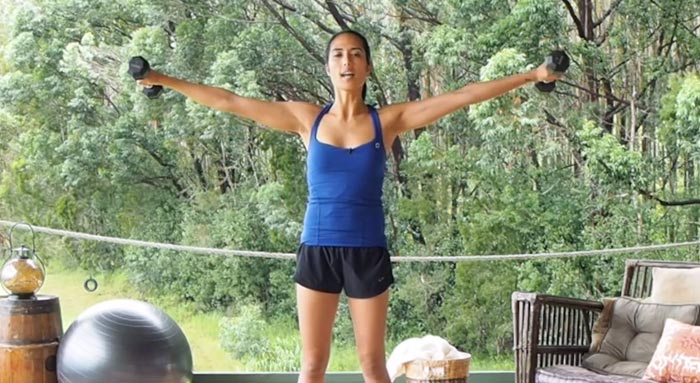
4. Standing Raise
You should use light weights for this exercise.
- From a standing position, start with your arms dangling to your side.
- Make sure that you keep your back as straight as possible and extend your arms as you raise the weights straight up to your side until your arms are parallel to the ground.
- Aim for 3 sets of ten repetitions.
Click here to see VIDEO of the specific exercise.
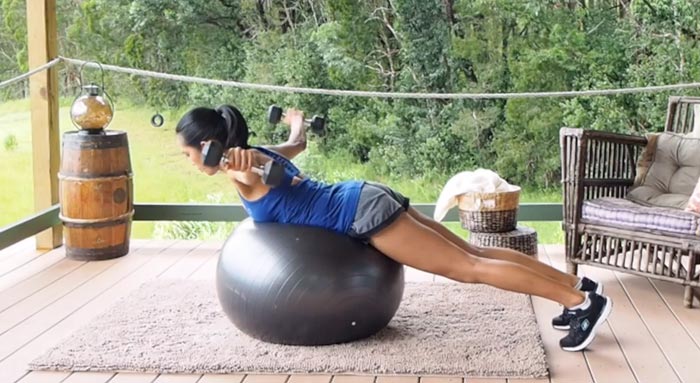
5. Bent Over Raise
This exercise also uses light weights.
- Start by sitting on the stability ball and bend your torso over until your back feels as if it is parallel to the floor, keep your feet flat on the mat for stability.
- Your arms should be extended towards the ground to your sides when you lift the weights.
- Raise the weights by lifting your arms to your sides as if you were a bird flapping its wings.
- Try to get your arms parallel to the floor.
- Aim for 3 sets of ten repetitions.
Click here to see VIDEO of the specific exercise.
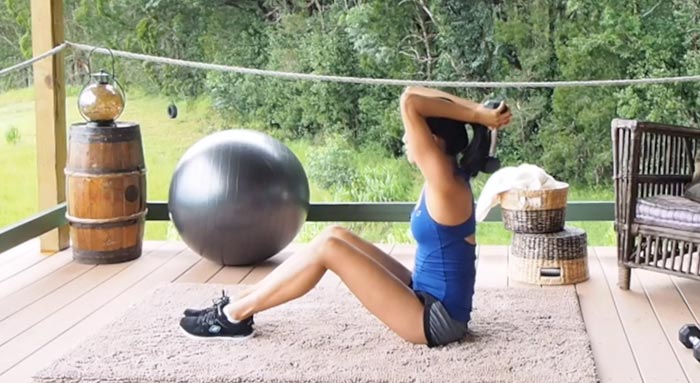
6. Triceps Raise
- Sit upright on the stability ball with your feet flat against the floor for stability.
- Pick up one of your light weights with your left hand and slowly drop the hand over and behind the head keeping your elbow tight besides your face.
- Using your triceps and back muscles, pivot your elbow and straighten your right arm so your hand is above the head.
- Do ten repetitions and then switch arms; aim for 3 sets of ten.
7. Upright Row
- Stand up with your back straight and your arms dangling in front of your body with your weights already in your hands….the palms of your hands should be facing your thighs.
- Start the movement by bringing your hands and arms directly up the body until your hands are almost at elbow height. This should resemble a rowing motion from a standing position.
- Slowly bring your arms back to their starting position and pause slightly.
- That is one repetition.
- Again, do 3 sets of ten.
Yoga poses for scoliosis
Yoga is wonderful exercise for flexibility, strengthening and posture and has the advantage of being extremely convenient. You can do it pretty much anytime and anyplace, so you don’t need access to weights and stability balls. The following yoga postures are recommended by experts in scoliosis.
Click here to see VIDEO of the specific exercise.
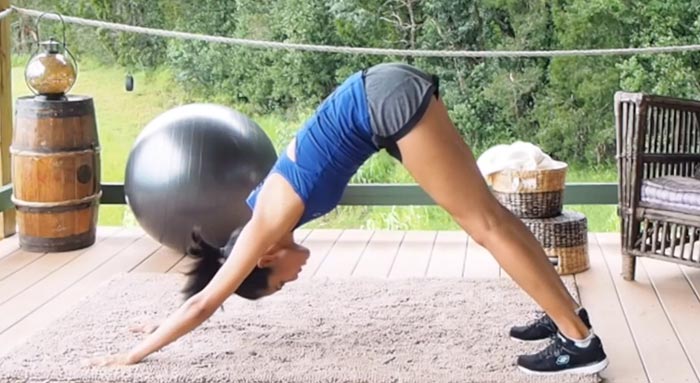
1. Downward facing Dog
- Start with your hands and knees on the mat then come up onto all fours so your back forms a table top and your limbs form the table legs. Keep your hands at shoulder width and your feet at the width of your hips with your fingers and toes pointing straight ahead..
- Exhale and raise your hips towards the ceiling while straightening your arms and legs until you are in an inverted v shape, your head and feet pushed towards the ground.
- Hold the pose and breathe deeply looking towards your naval.
- As you exhale, bend your knees and bring your body back to the table pose
Click here to see VIDEO of the specific exercise.
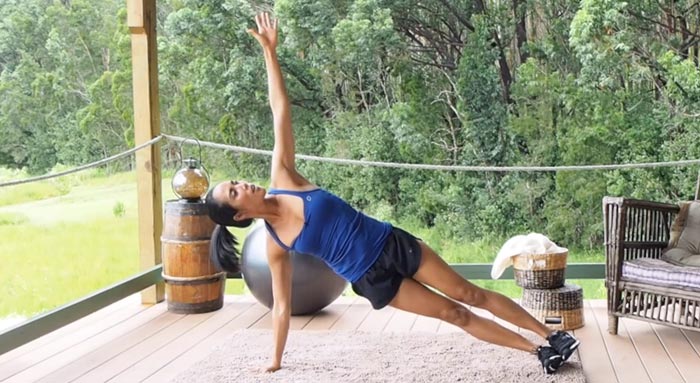
2. Side Plank
Recent research has shown that spine curvature in scoliosis sufferers has been significantly reduced by performing the side plank for just 90 seconds every day. http://www.medicalnewstoday.com/articles/283689.php
Perform this pose on the side of the spine which is curved.
- Start the posture in the downward dog position.
- Lower the hips and bring your weight forward into a plank position as if you were about to do a push-up.
- Bring the feet together letting your right arm take the weight.
- Roll your body over to the right keeping your legs extended and straight with your balance on the edge of the right foot.
- Raise your left arm and fingertips to the ceiling and press your heels into the mat.
- Bring your entire body into a straight line and look at your right hand.
- Hold the pose for around 30 seconds and breathe out deeply as you slowly bring your body back to the plank position.
Click here to see VIDEO of the specific exercise.
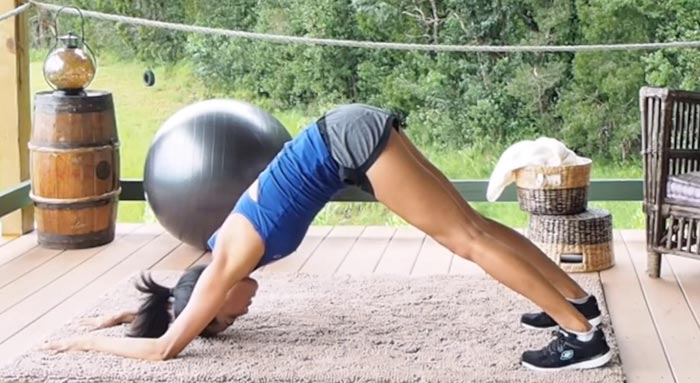
3. Dolphin
The dolphin pose is a variation on the downward facing dog and is easier to perform, especially for beginners
- Start on your hands and your knees, your wrists under the shoulders and knees aligned underneath your hips with your fingers pointed forwards.
- Lower the elbows to the mat in line with and underneath your shoulders with your forearms flat against the mat parallel to each other.
- Press your toes into the mat and raise your knees away from the ground. Reach your hips into the ceiling so that your body resembles an inverted V.
- Keep your entire body extended in the pose with your back and legs straight.
- Relax and allow your head to look back towards your belly.
- Hold the position for at least 20 breaths, exhale and come back to the starting position.
Below is the whole exercise video
Other recommended yoga poses for scoliosis sufferers are:
• The cobra
• The extended table
• The mountain
• Standing forward fold
• Yoga sit ups


Leave a Reply
You must be logged in to post a comment.